GSAP ScrollTrigger Tutorial: Animate on Scroll (2025)
Learn GSAP ScrollTrigger with step-by-step examples. Includes code snippets, performance tips, and ready-to-use scroll animations for your project.

Estimated reading time: 10 minutes | Skill level: Beginner to Intermediate
I've been building scroll animations for years, and I can't count how many times I've seen janky, stuttering scroll effects that ruin an otherwise beautiful site.
The culprit? Usually poorly implemented scroll listeners or awkward Intersection Observer setups.
In this tutorial, I'll show you exactly how to create smooth, performant scroll animations using GSAP ScrollTrigger. You'll learn:
- How ScrollTrigger works and why it's better than alternatives
- Setting up your first scroll animation in under 5 minutes
- Creating parallax effects that run at 60fps
- Performance optimization tricks I use in production
- Troubleshooting common issues
By the end, you'll be able to build scroll animations that feel butter-smooth. Let's dive in.
What Is GSAP ScrollTrigger?
GSAP ScrollTrigger is a plugin that creates scroll-based animations by triggering GSAP tweens when elements enter or leave the viewport. It handles scroll events efficiently, works across all major browsers, and gives you precise control over animation timing.
Why ScrollTrigger Over Intersection Observer?
I've used both extensively. ScrollTrigger wins because:
- Precision: You can trigger animations at exact scroll positions (not just visibility)
- Scrubbing: Link animation progress directly to scroll position
- Performance: Built-in throttling and optimization
- Features: Pin elements, horizontal scrolling, batch animations out of the box
Real-world use cases:
- Fade in content as users scroll
- Parallax background effects
- Pin navigation while scrolling
- Animate progress bars based on page scroll
- Reveal text character by character
Prerequisites and Setup
Before we start, you should have:
- Basic JavaScript knowledge (variables, functions)
- Understanding of CSS positioning
- A code editor and browser
That's it. You don't need to be a GSAP expert.
Installing GSAP and ScrollTrigger
The fastest way is via CDN (great for learning). For production, use npm.
Option 1: CDN (Quick Start)
<!-- Add before closing </body> tag -->
<script src="https://cdnjs.cloudflare.com/ajax/libs/gsap/3.12.5/gsap.min.js"></script>
<script src="https://cdnjs.cloudflare.com/ajax/libs/gsap/3.12.5/ScrollTrigger.min.js"></script>
Option 2: NPM (Production)
npm install gsap
Then import in your JavaScript:
import { gsap } from "gsap";
import { ScrollTrigger } from "gsap/ScrollTrigger";

// Register the plugin
gsap.registerPlugin(ScrollTrigger);
Project Structure
Here's the basic HTML structure we'll use:
<!DOCTYPE html>
<html lang="en">
  <head>
    <meta charset="UTF-8" />
    <meta name="viewport" content="width=device-width, initial-scale=1.0" />
    <title>ScrollTrigger Demo</title>
    <style>
      body {
        margin: 0;
        font-family: system-ui, sans-serif;
        background: #0a0a0a;
        color: #fafafa;
      }

      section {
        height: 100vh;
        display: flex;
        align-items: center;
        justify-content: center;
        font-size: 3rem;
        font-weight: 600;
      }

      .box {
        width: 200px;
        height: 200px;
        background: #a4fb81;
        border-radius: 6px;
      }
    </style>
  </head>
  <body>
    <section>
      <h1>Scroll Down</h1>
    </section>

    <section>
      <div class="box"></div>
    </section>

    <!-- Scripts here -->
  </body>
</html>
Your First Scroll Animation
Let's create a simple fade-in effect. When the.box// Select your element
const box = document.querySelector(".box");
// Create the animation
gsap.fromTo(
box,
{
// Starting state
opacity: 0,
y: 100,
},
{
// Ending state
opacity: 1,
y: 0,
duration: 1,
ease: "power4.out",
// ScrollTrigger configuration
scrollTrigger: {
trigger: box, // Element that triggers the animation
start: "top 80%", // Animation starts when top of box hits 80% of viewport
end: "bottom 20%", // Animation ends when bottom of box hits 20% of viewport
toggleActions: "play none none reverse", // Play on enter, reverse on leave
},
}
);
Breaking it down:
- - Fades in the element
opacity: 0 → 1 - - Moves up 100px as it fades in
y: 100 → 0 - - Takes 1 second to complete
duration: 1 - - Smooth, natural easing (my go-to)
ease: "power4.out" - - The animation starts when THIS element enters viewport
trigger: box - - Trigger when top of box reaches 80% down the viewport
start: "top 80%" - - What happens on enter/leave/enter-back/leave-back
toggleActions
Result: Scroll down and watch the box fade in smoothly.
Want this animation ready to use? Check out our Fade In on Scroll animation in Annnimate.
Understanding ScrollTrigger Properties
ScrollTrigger has several key properties. Let's break down the most important ones.
The trigger Property
This is the element that activates the animation. It doesn't have to be the element you're animating.
scrollTrigger: {
  trigger: ".section",  // Watch this element
  // Animate something else
}
Start and End Positions
Thestartend"[trigger position] [viewport position]"
Examples:
start: "top top"; // Trigger's top hits viewport's top
start: "top center"; // Trigger's top hits viewport's center
start: "top 80%"; // Trigger's top hits 80% down viewport
start: "bottom bottom"; // Trigger's bottom hits viewport's bottom
Scrub vs Toggle
Toggle (default): Animation plays once when triggered
scrollTrigger: {
  trigger: box,
  start: "top 80%",
  // Animation plays, then stops
}
Scrub: Animation progress tied to scroll position
scrollTrigger: {
  trigger: box,
  start: "top bottom",
  end: "bottom top",
  scrub: true  // Animation follows scroll
}
scrub: truescrub: 1Adding Parallax Effects
Parallax is when background elements move slower than foreground elements, creating depth. It's easier than you think with ScrollTrigger.
Basic Parallax Setup
// Parallax background
gsap.to(".parallax-bg", {
  y: -200, // Move up 200px
  ease: "none", // Linear movement for parallax
  scrollTrigger: {
    trigger: ".parallax-section",
    start: "top bottom",
    end: "bottom top",
    scrub: 1, // Smooth lag effect
  },
});

// Faster moving foreground
gsap.to(".parallax-fg", {
  y: 100, // Move down 100px
  ease: "none",
  scrollTrigger: {
    trigger: ".parallax-section",
    start: "top bottom",
    end: "bottom top",
    scrub: 1,
  },
});
How it works:
- Background moves in opposite direction (-200px up)
- Foreground moves less (100px down)
- Different speeds create the depth illusion
- links animation to scroll with slight delay
scrub: 1
ease: "none"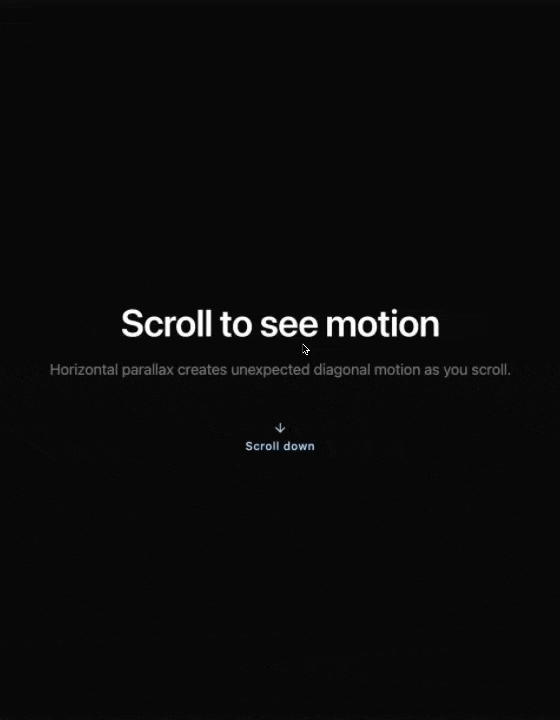
Want production-ready parallax? Grab our Parallax Scroll animation from Annnimate with all the optimization built-in.
Performance Optimization
Scroll animations can tank performance if you're not careful. Here's how to keep them buttery smooth.
1. Use GPU Acceleration
Always animatexyscalerotationlefttopwidthheight// ❌ BAD - Triggers layout recalculation
gsap.to(box, {
left: "100px",
top: "50px",
});
// ✅ GOOD - GPU accelerated
gsap.to(box, {
x: 100,
y: 50,
force3D: true, // Force GPU acceleration
});
2. Optimize Scrub Values
Lower scrub values = smoother but more CPU intensive.
scrub: 0.5; // Very smooth, higher CPU load
scrub: 1; // Balanced (recommended)
scrub: 2; // More lag, lower CPU load
scrub: 13. Batch Similar Animations
Instead of creating separate ScrollTriggers for each element:
// ❌ BAD - Creates 50 ScrollTriggers
document.querySelectorAll(".card").forEach((card) => {
  gsap.from(card, {
    opacity: 0,
    scrollTrigger: { trigger: card },
  });
});

// ✅ GOOD - One ScrollTrigger for all
ScrollTrigger.batch(".card", {
  onEnter: (batch) =>
    gsap.from(batch, {
      opacity: 0,
      y: 60,
      stagger: 0.15,
    }),
});
Testing Performance: Open Chrome DevTools → Performance tab → Record while scrolling. You should see 60fps frame rate (green line) with no long tasks (yellow/red bars).
Advanced Techniques
Once you've mastered the basics, try these:
Pinning Elements
Pin an element while other content scrolls past:
ScrollTrigger.create({
  trigger: ".pin-section",
  pin: true, // Pin this element
  start: "top top",
  end: "+=500", // Pin for 500px of scrolling
});
Great for sticky navigation, side-by-side reveal content, and scroll-based storytelling.
Horizontal Scrolling
Create horizontal scroll sections:
const sections = gsap.utils.toArray(".horizontal-section");

gsap.to(sections, {
  xPercent: -100 * (sections.length - 1),
  ease: "none",
  scrollTrigger: {
    trigger: ".horizontal-container",
    pin: true,
    scrub: 1,
    end: () =>
      "+=" + document.querySelector(".horizontal-container").offsetWidth,
  },
});
Want more advanced examples? Check out our collection of scroll animations in Annnimate.
Troubleshooting Common Issues
Problem: Animation Not Triggering
Symptoms: Nothing happens when you scroll
Solutions:
- Check if GSAP and ScrollTrigger are loaded
- Add to see trigger points
markers: true - Verify your and
startpositionsend - Make sure the trigger element exists in the DOM
Problem: Stuttering/Lag
Symptoms: Animation feels janky, dropped frames
Solutions:
- Animate instead of
x/yleft/top - Add
force3D: true - Reduce scrub intensity (instead of
scrub: 2)scrub: 0.5 - Avoid animating expensive properties (filter, box-shadow)
- Use for many elements
ScrollTrigger.batch()
Problem: Mobile Not Working
Symptoms: Works on desktop, breaks on mobile
Solution: UsematchMediaScrollTrigger.matchMedia({
// Desktop
"(min-width: 768px)": function () {
gsap.to(box, {
x: 500,
scrollTrigger: { trigger: box },
});
},
// Mobile
"(max-width: 767px)": function () {
gsap.to(box, {
x: 200, // Less movement on mobile
scrollTrigger: { trigger: box },
});
},
});
Key Takeaways
Here's what we covered:
- ScrollTrigger creates scroll-based animations with precise control and great performance
- Start with basics: ,
trigger,start, andendare all you needtoggleActions - Scrub for parallax: Link animation progress to scroll position
- Optimize for 60fps: Use x/y properties, force3D, and batch animations
- Debug with markers: Add markers: true to see exactly when animations trigger
Want to skip the setup entirely? I've built 40+ production-ready scroll animations in Annnimate. Each one is optimized, tested, and ready to copy-paste into your project. Explore the collection.
What's Next?
Now that you've mastered ScrollTrigger basics, try:
Questions? Found this helpful? Let me know on Twitter or join our community.
Happy scrolling! 🚀
Written by
Julian Fella
Founder
Related reading

GSAP ScrollTrigger Examples: 10 Scroll Animations You Can Use Today
Ten production-ready GSAP ScrollTrigger patterns: fade reveals, parallax, text effects, SVG drawing, mask reveals, and flip animations. Copy-paste code for each.

Intersection Observer vs GSAP ScrollTrigger: Which Should You Use?
Comparing Intersection Observer and GSAP ScrollTrigger for scroll animations. Performance, control, scrub, batch, and when each approach makes sense.

GSAP Text Animation: A Practical SplitText Guide (2026)
How to animate text with GSAP SplitText. Covers chars, words, and lines with scroll-triggered reveals, stagger, and mask effects. Copy-paste examples included.